Layers
Creating Layers
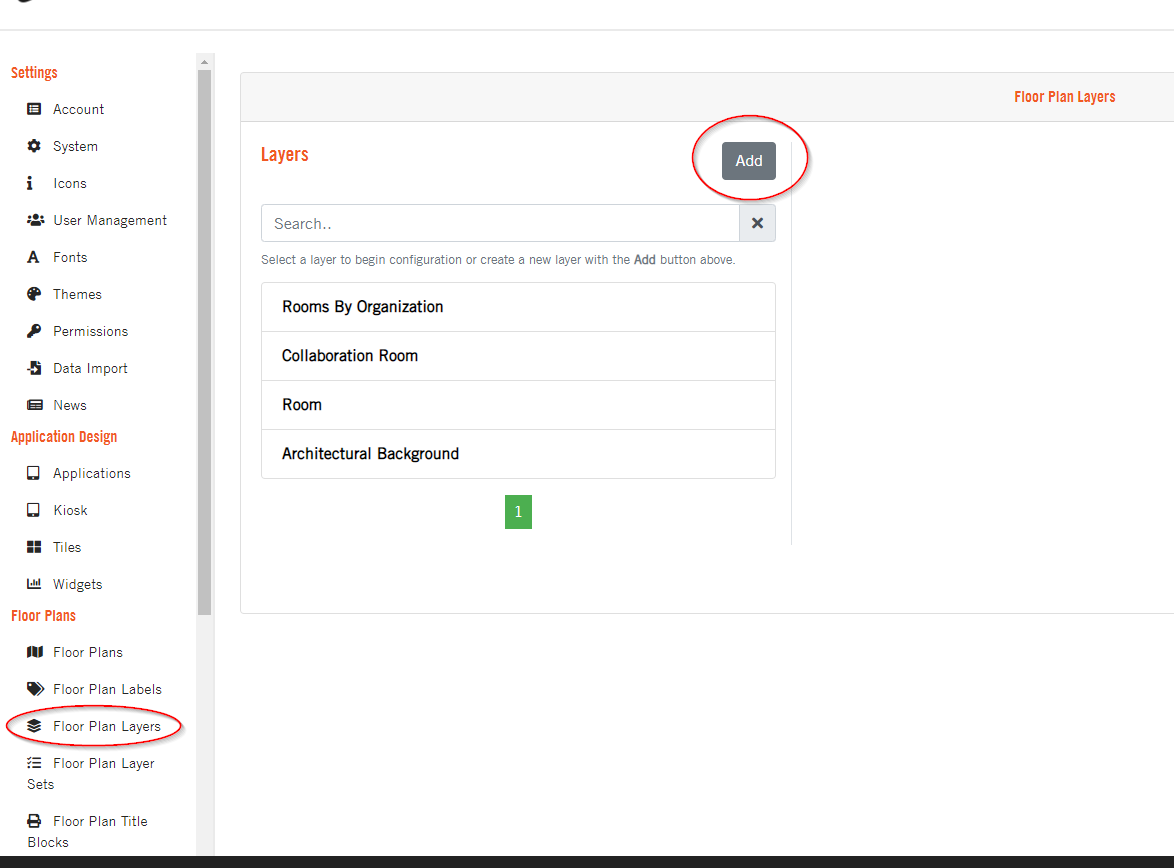
Open the OSIS Admin tools page (/osis/admin/) and scroll down to the Floor Plan Section. Click the Floor Plan Layers link.
Click Add to start the Layer creation process.
A Layer can be of two types:
- Assets: these are layers that can be stylized, can display information in labels or pop-ups.
- Aesthetic: these indicates background details, used for contextual details like Architecture and Furniture.
Give the Layer a descriptive Label. Select the Layer and the Layer Type Furniture and Wall layers should have Assets as its Layer Type. The Show in Legend option indicates whether or not this Layer will appear in the Floor Plan legend. Set a Default Layer Label that will always appear whenever the layer is displayed, or leave blank if you’d prefer the layer to appear without any labels. Fill in other fields with preferred values.

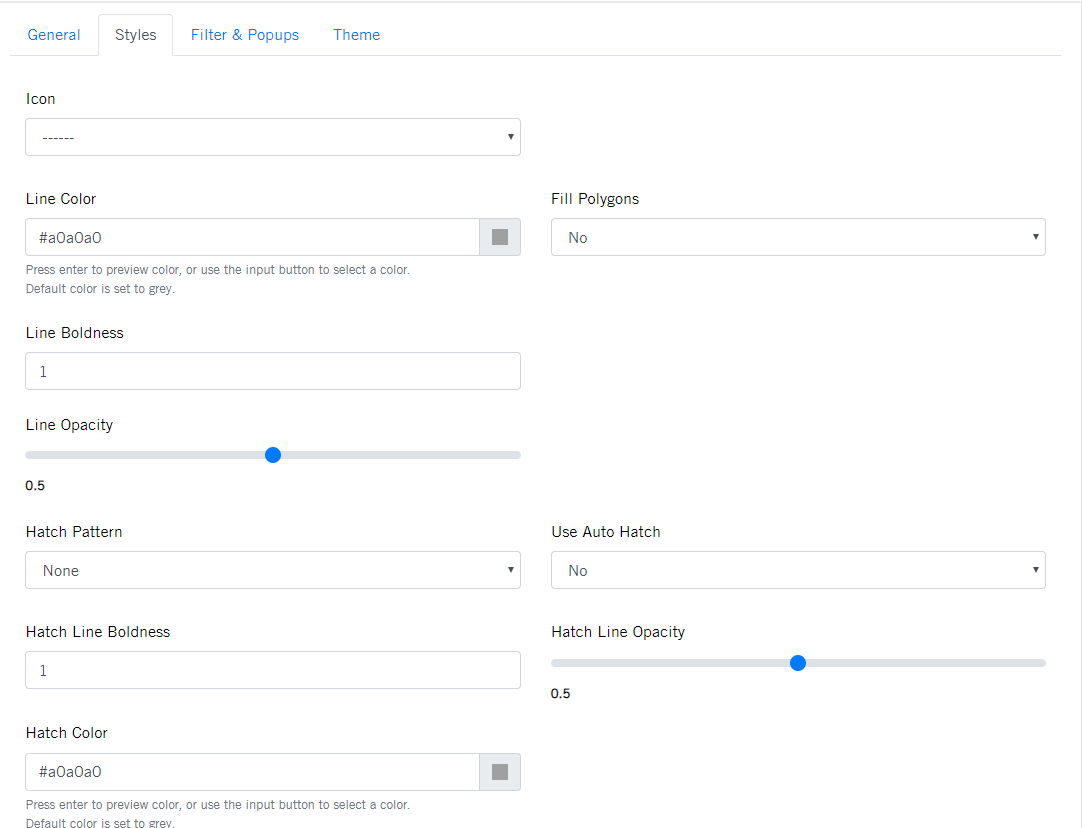
In the Styles Tab, add an Icon to the Layer if necessary. Set the opacity of the items. Opacity describes the transparency of an item, and ranges from 0 to 1; where 0 is completely transparent, and 1 is not transparent at all.
Layer Filters
Adding filter(s) helps clean up the layer renderings, by only bringing in the necessary items that will be styled on the layer. Multiple filters can be applied to a layer.
Items filtered into the layer will be styled based on the setting in the ‘Styles’ tab.
Please make sure the filter values are the same as the themes if applying a theme.
Adding Filters to Layers
Open the Filter & Popups Tab, click the Add Layer Filter button. Select the newly created item, select the desired Filter field, Operator and Value to look for
Pop-ups
These display information like data, links, and images, and appear when a space is clicked on within a floorplan.
Adding Pop-ups to Layers
Open the Filter & Popups Tab, click the Add to Pop-up button. Select the newly created item, set a Data Label if you’d like. A label could be some text you want to display as a pop-up data that will appear before the value, or any of the following:
<br>- to represent a line break<hr>- to represent an horizontal line
Select the preferred Data Value after adding the Label
Adding Themes to Layer
Select whether or not to Apply a Theme to the Layer. If applying a theme, you can either auto generate a theme, or create one manually.
Creating a Theme Manually
Please make sure to filter in all the items you are trying to theme on. This helps clean up the layer renderings, by only bringing in the necessary items that will be styled on the layer. Also make sure to use the same theme levels when setting the filter values.
Set Apply Theme to Yes and Auto Generate to No. Select the field and corresponding level that we will be applying a theme for, then save Layer.
After saving layer, open the newly created layer and proceed to the Theme tab, use to plus button to add a new theme rule.
Measurements for Layer Legend Item
To display measurements on the Legend for a Layer, navigate to the Display Measurement tab for the specific Layer.
Select the type(s) of measurement to display, then save.
