Layerset
Creating a Layerset
Open the OSIS Admin page (/osis/admin/) and scroll down to the Floor Plan Section. Click the Floor Plan Layerset and click Add to open up the create new layerset form.
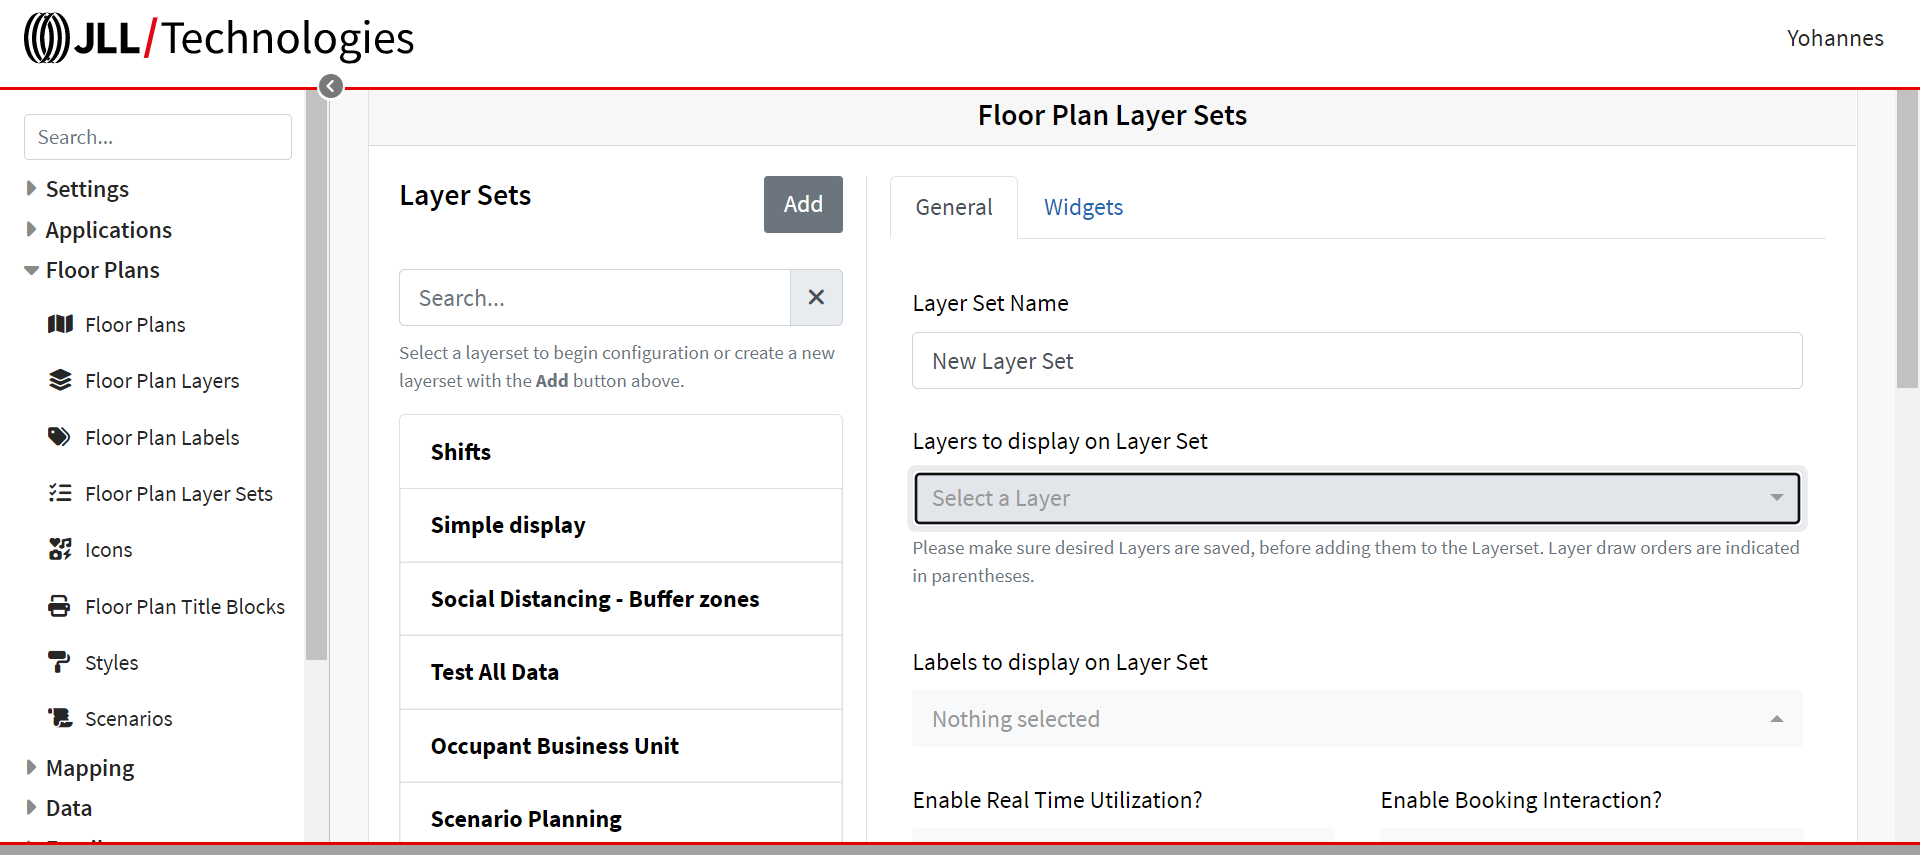
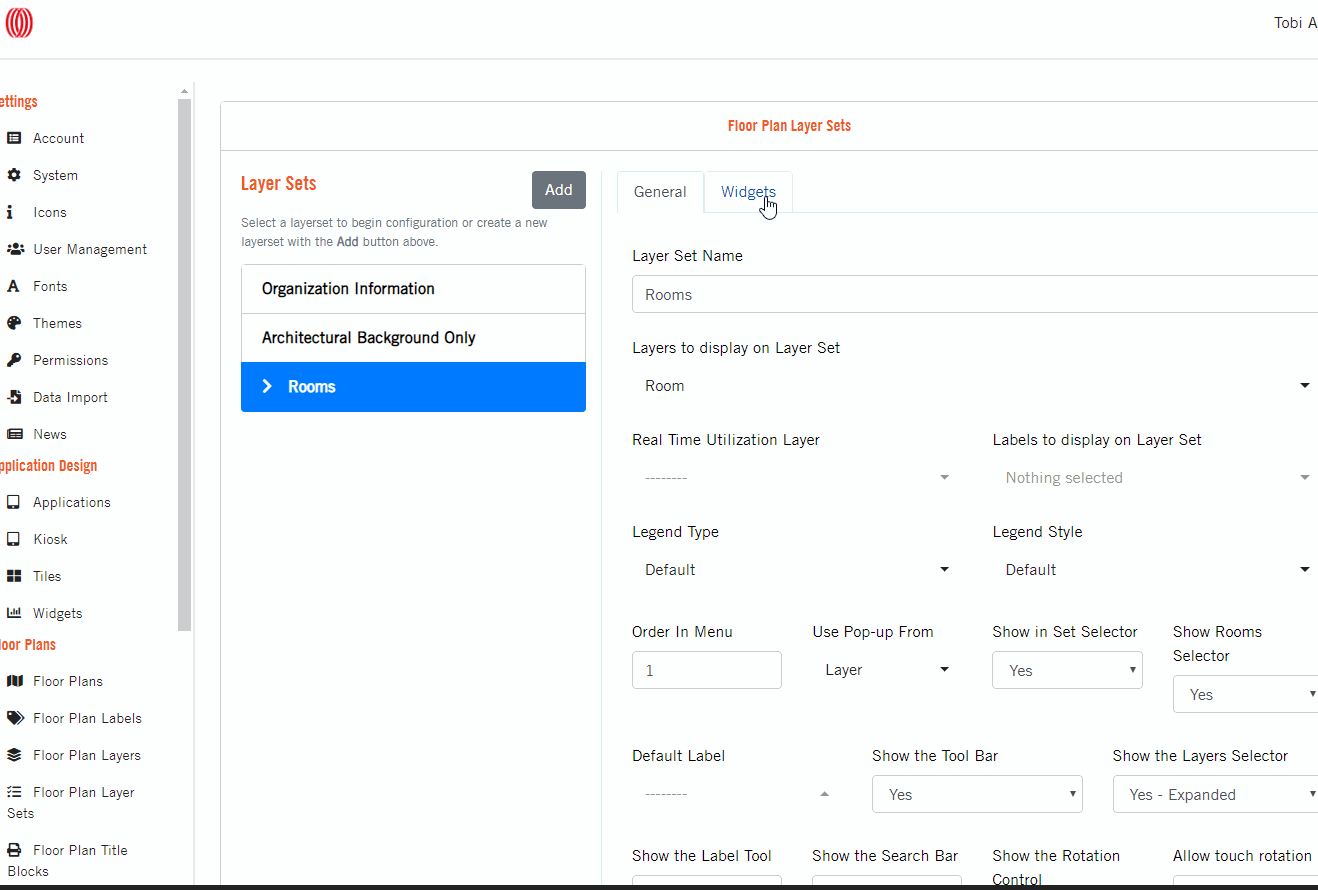
Give the layerset a descriptive Name. Select Layers that should appear in the Layerset. Select Labels that will be available on the Layerset, and be sure to also set a Default Label that will always be available.
To use this layerset as a Real Time Utilization Layer select the layer styling that was created for this purpose or leave as default to have a regular layerset.
You can choose to Use Pop-up From topmost layer in the layerset or define one on the layerset. Fill in other fields as preferred.

Attaching a Widget to a Layerset
Once a Layerset has been created, an OSIS admin user can attach that Layerset to a widget that can be used on a Floor Plan.
Widgets will be displayed on the legend using the provided label.
To do this, navigate to the OSIS Admin page (/osis/admin/) and scroll down to the Floor Plan Section. Click the Floor Plan Layerset and select the Layerset you would like to attach a Widget to.
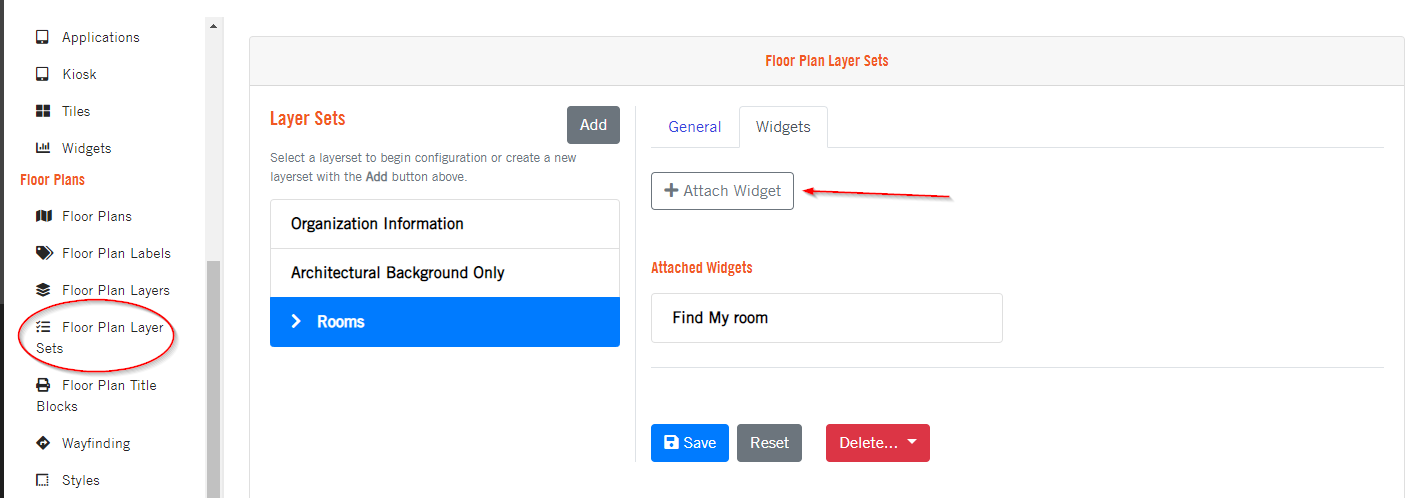
Click the Attach Widget button to display the form. Give the widget a descriptive label and select the desired Widget, fill in other fields as desired and save.
During the save process, any parameters associated with that widget is also created and tied to the new record. To edit any of these parameters, click on the new widget from the list, open the Parameters tab and edit.