Wayfinding
Overview
OSIS Way-finding allows for the definition of way-points and routes on a floor plan to help users navigate a floor space. To set up these points and routes we use the Way-finding tool in the OSIS Administrator interface.
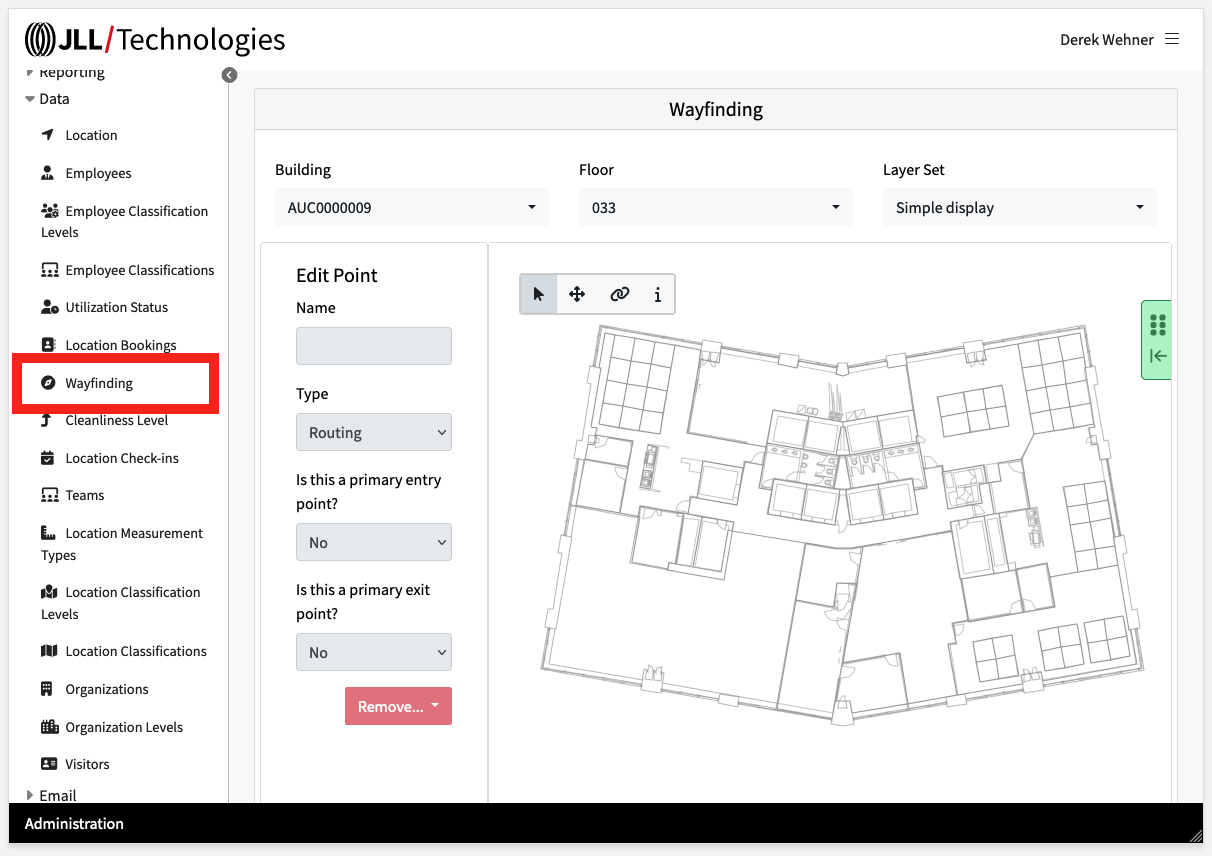
Creating Way-points
- Double-click on the floor plan to add a way-point
- Name your point and set some point details
- It is recommended to start by identifying your primary entry point (usually your elevator lobby area)
- Double click to add and name additional points.
- When first added to the plan, points are shown in red and will turn green once named.
- Draw connections between points using the link tool. Start by clicking and holding at a start point and dragging to the next.
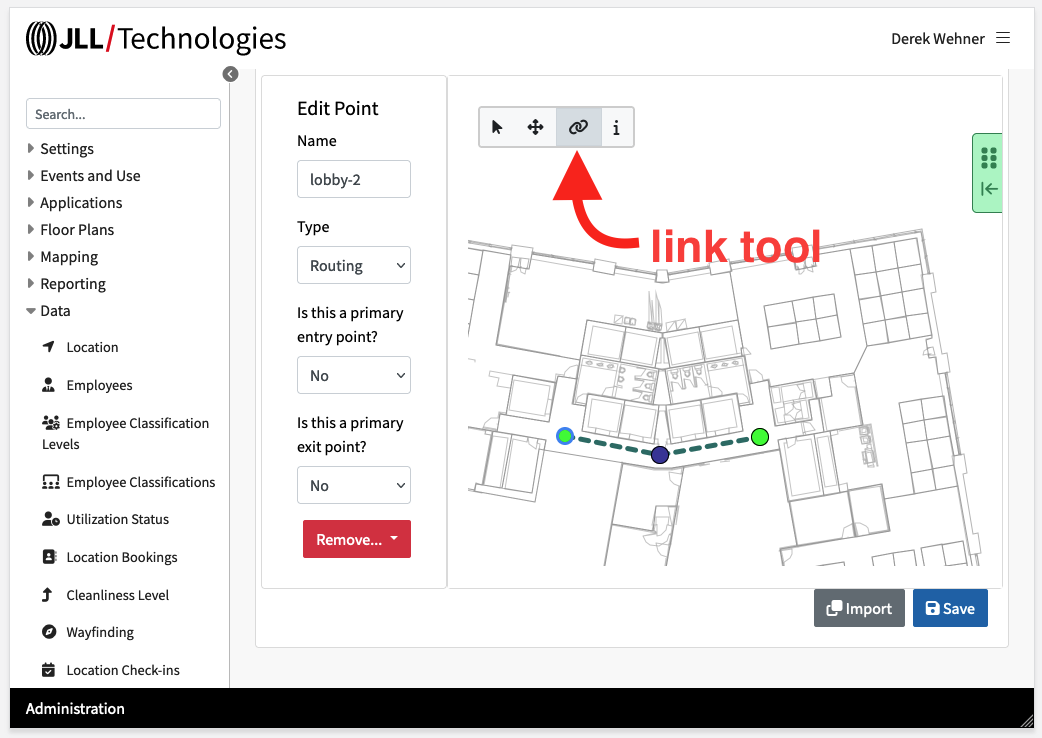
- Reminder: Save your work periodically
General Tips
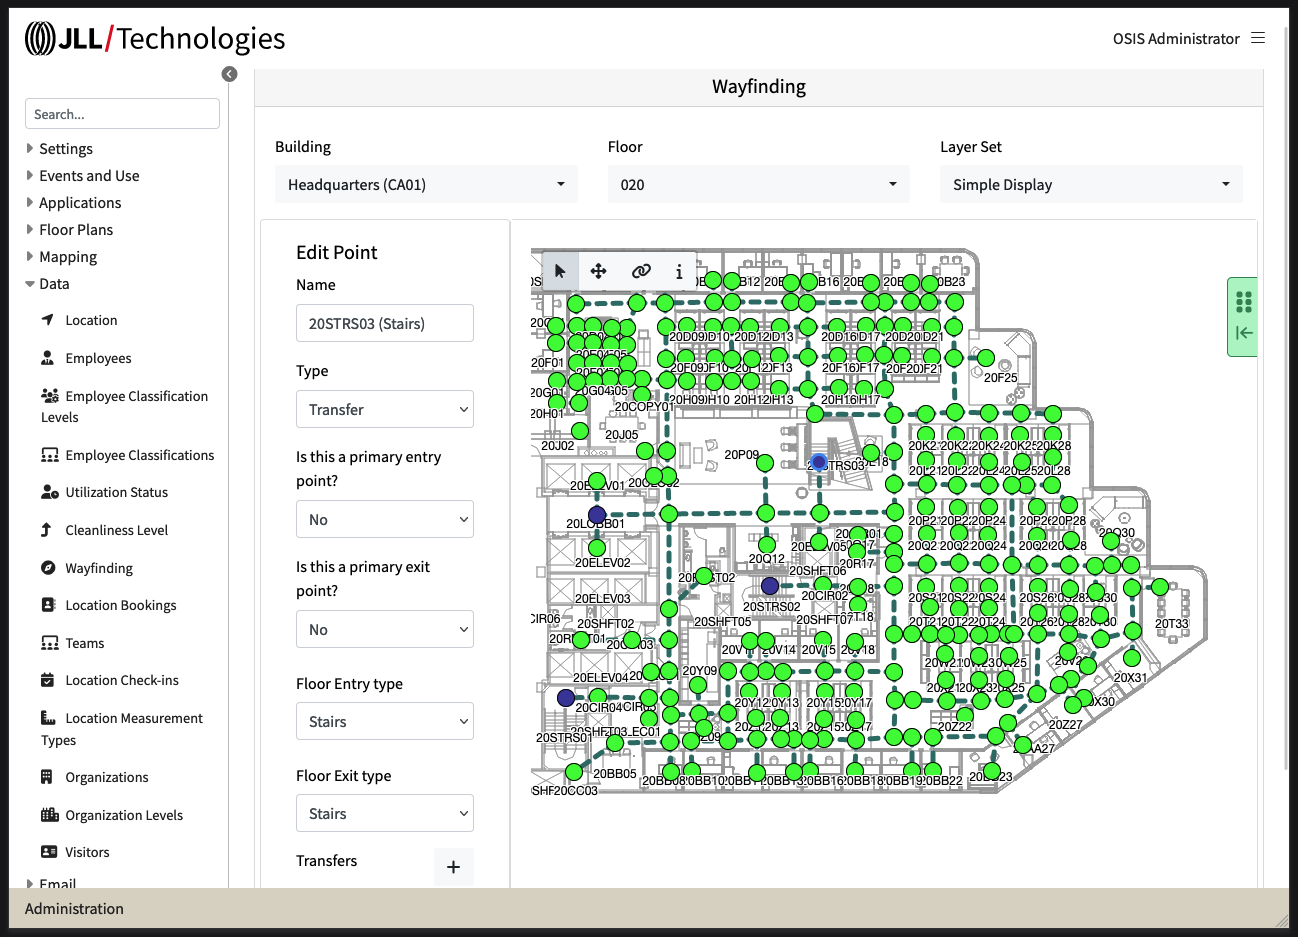
- Creating a simple network is recommended. To many points and intertwined links can lead to unintended routes being suggested for end-users.
- Route point descriptions are visible to end users and can include basic instructions.
Sample Routing
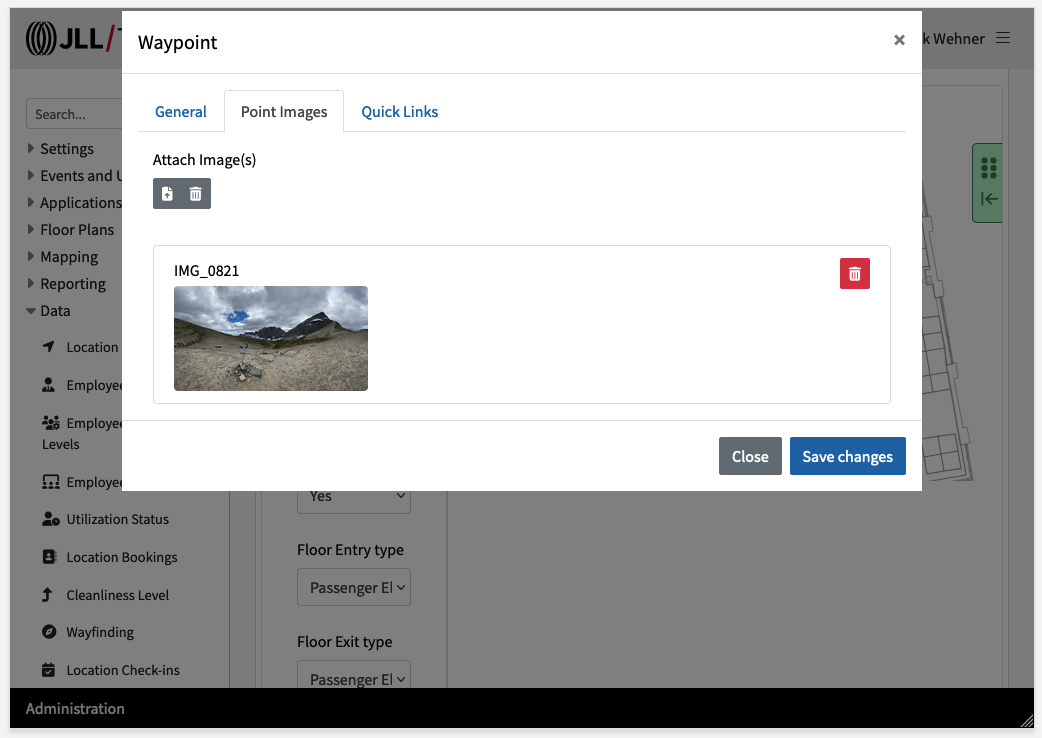
Adding Images To Way-points
- Select the information toolbar button.
- Click on a way-point to edit additional information for the point such as adding a description or uploading 1 or more image files.