Map layers
Creating New Map Layers
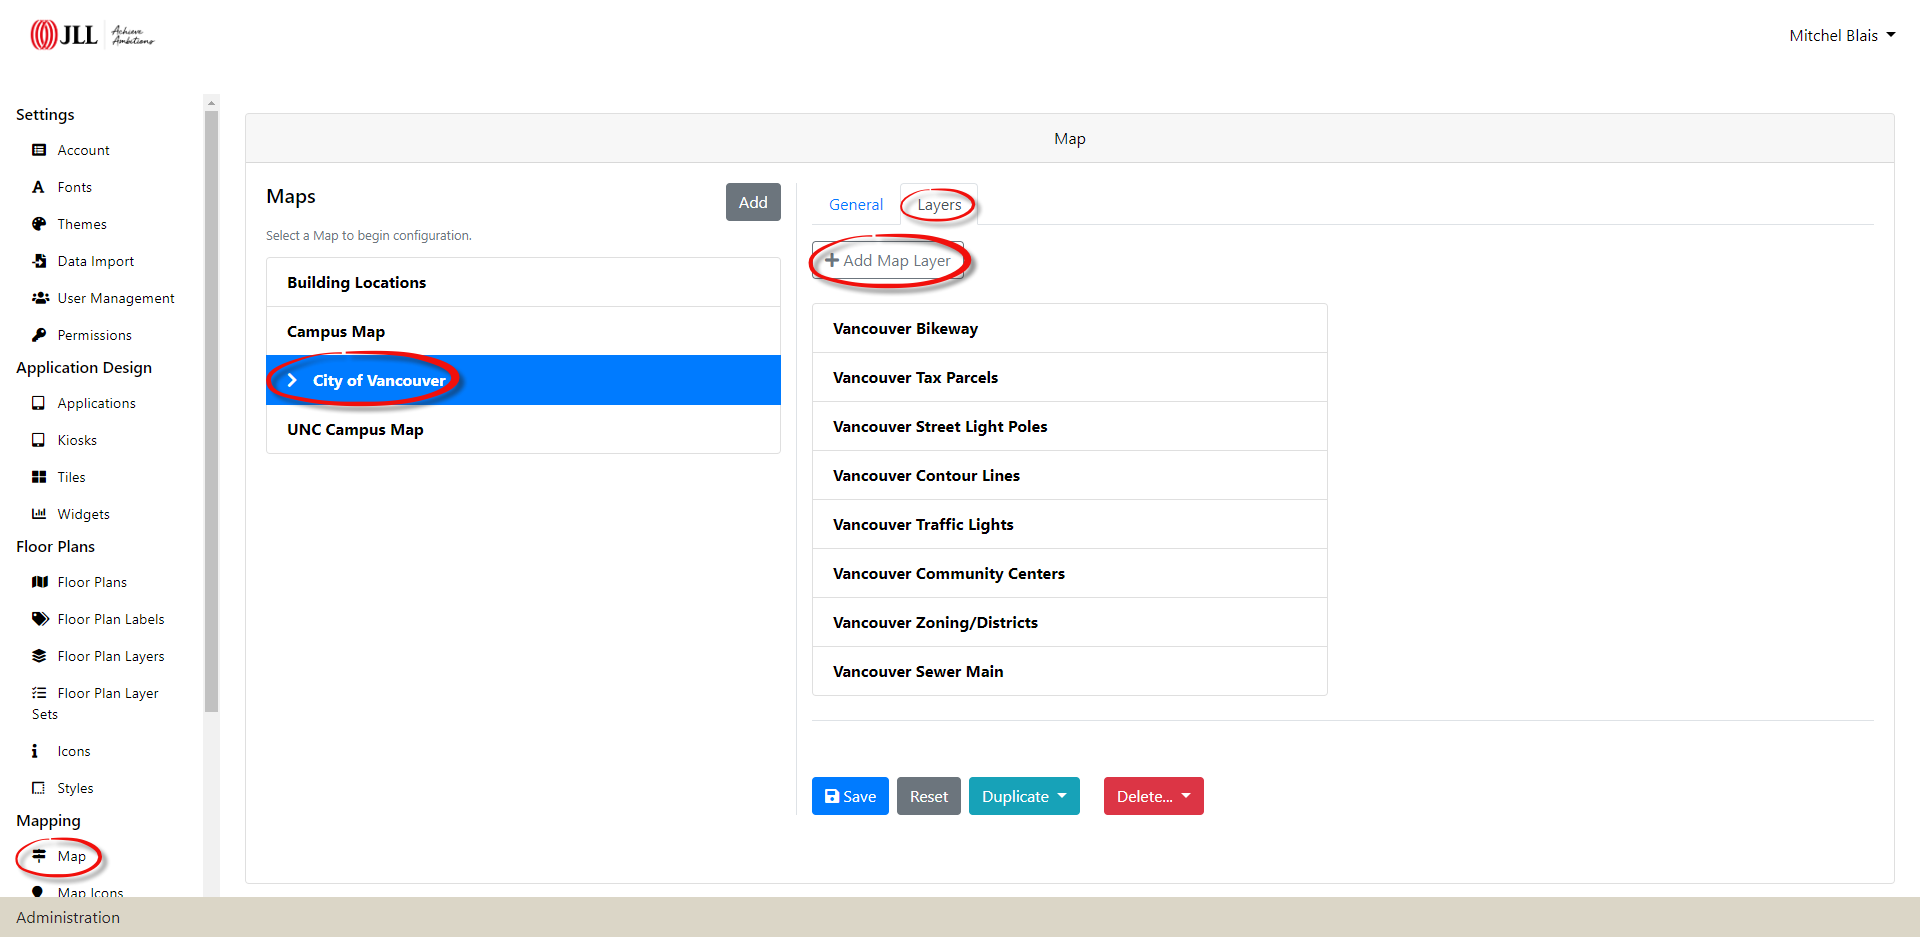
Open the OSIS Admin page (/osis/admin/) and scroll down to the Mapping Section. Click the Map Link, choose an existing map and under the Layers tab click +Add Map Layer.
Map Layer - General Tab
Enter a Title and an optional Description for the new layer.
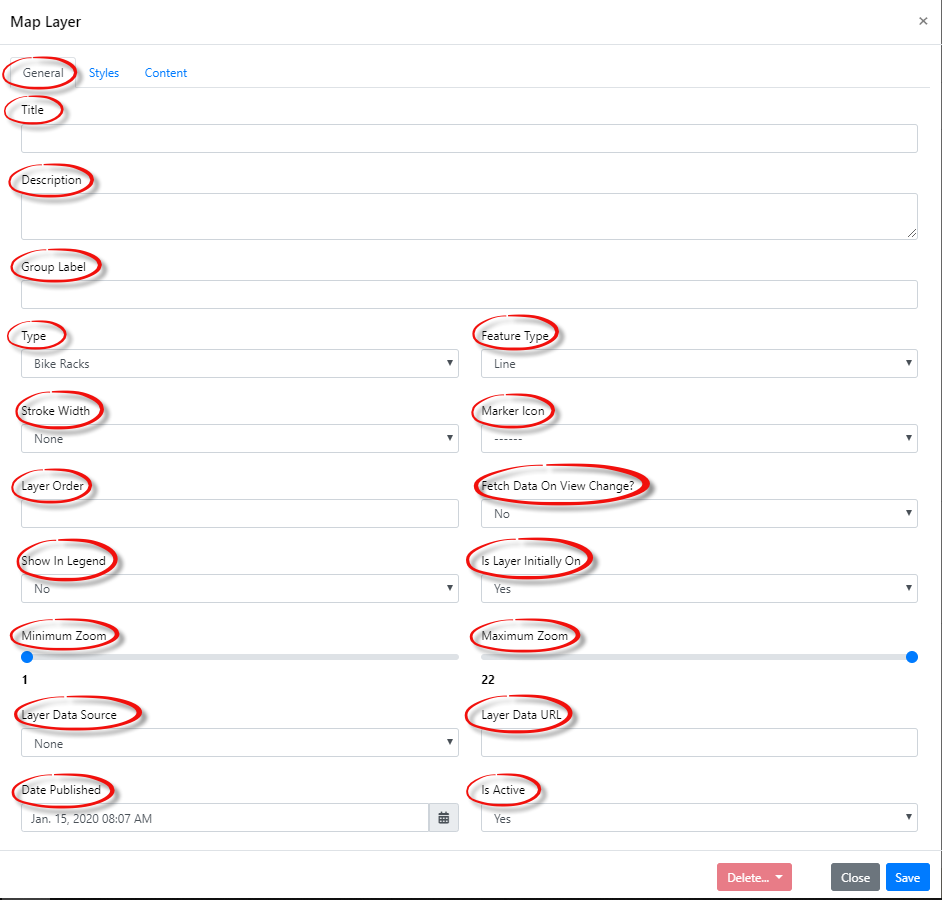
The map layers can be grouped under a parent node via the Group Label and are listed in ascending order. Each layer under the same node must have the exact same group label. If the group label is left blank the layers will remain under the same blank node as highlighted in the image below.
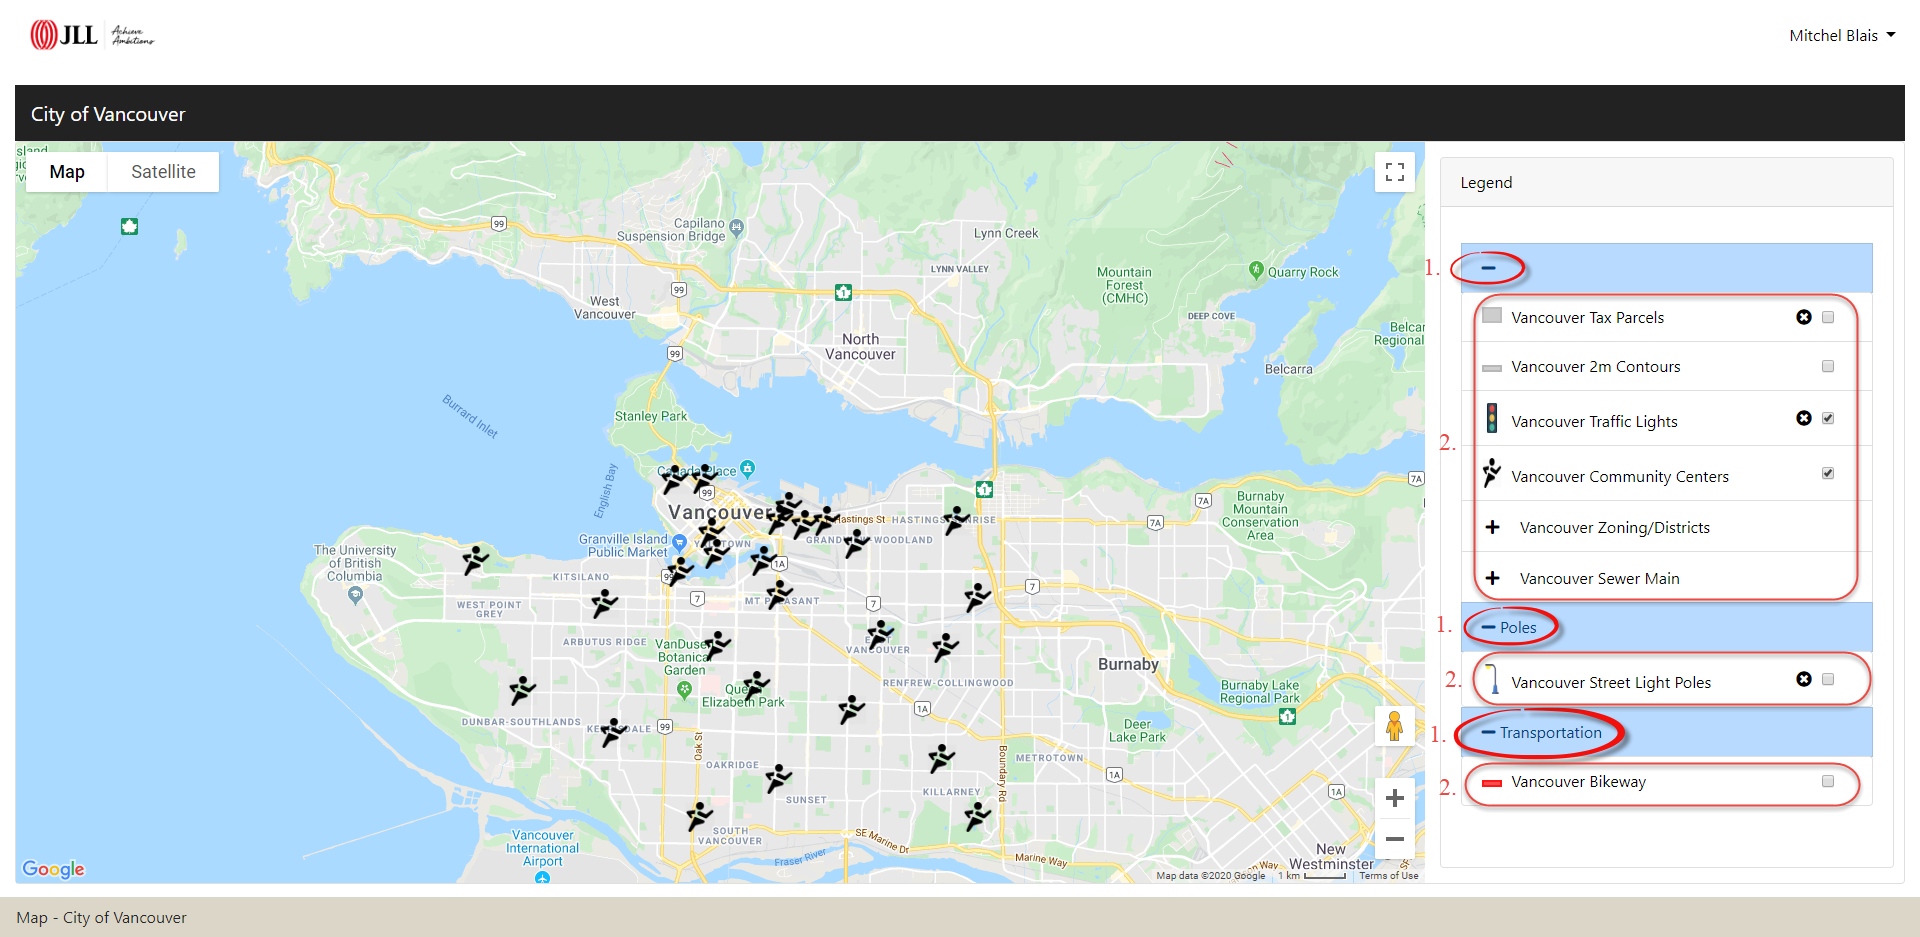
The Layer Order sorts the layers in the legend. A layer with an order of 0 will sit above a layer with an order of 10. If the layers have a Group Label the nodes are sorted first in ascending order then all layers within each node are sorted in ascending order based on their Layer Order. In the above image, the nodes are ordered by the Group Label nodes and within each group there are layers sorted by their Layer Order values.
Each map layer can be grouped into a specific Type. Select Other if the layer’s type is unknown.
Depending on the layers geometry type, choose one of the three Feature Type’s listed (Line, Point, Polygon) that represent the new layer. If the new layer is a line or a polygon you can set the stroke size by selecting a value in the Stroke Width dropdown. The Marker Icon may be used when configuring a point layer. These icons are created in the Map Icon form in the image below.
![]()
Every time the map is panned or zoomed, OSIS will reload the layer records within the users current bounding box (view) when the Fetch Data On View Change? is set to yes. This feature is great for layers with thousands/millions of records and is best served up with Geoserver.
In order to hide the layer from the legend one would turn the Show in Legend to no. The layer still shows in the map, however, users cannot turn the layer on/off. If the Is Layer Initially On is set to yes the layer will display when the map first loads and as long as the layer is within the Minimum/Maximum Zoom levels.
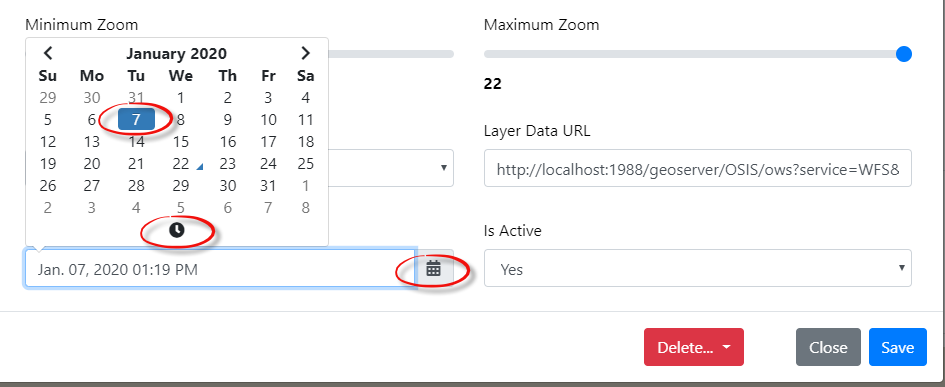
The Minimum & Maximum Zoom levels are set by dragging the range slider from 1 (Zoomed Out) to 22 (Zoomed In). If the layer is outside of the zoom range a black x will display beside the layer in the legend. When the user tries to turn on the layer outside of the zoom range OSIS will alert the user as seen in the image below.

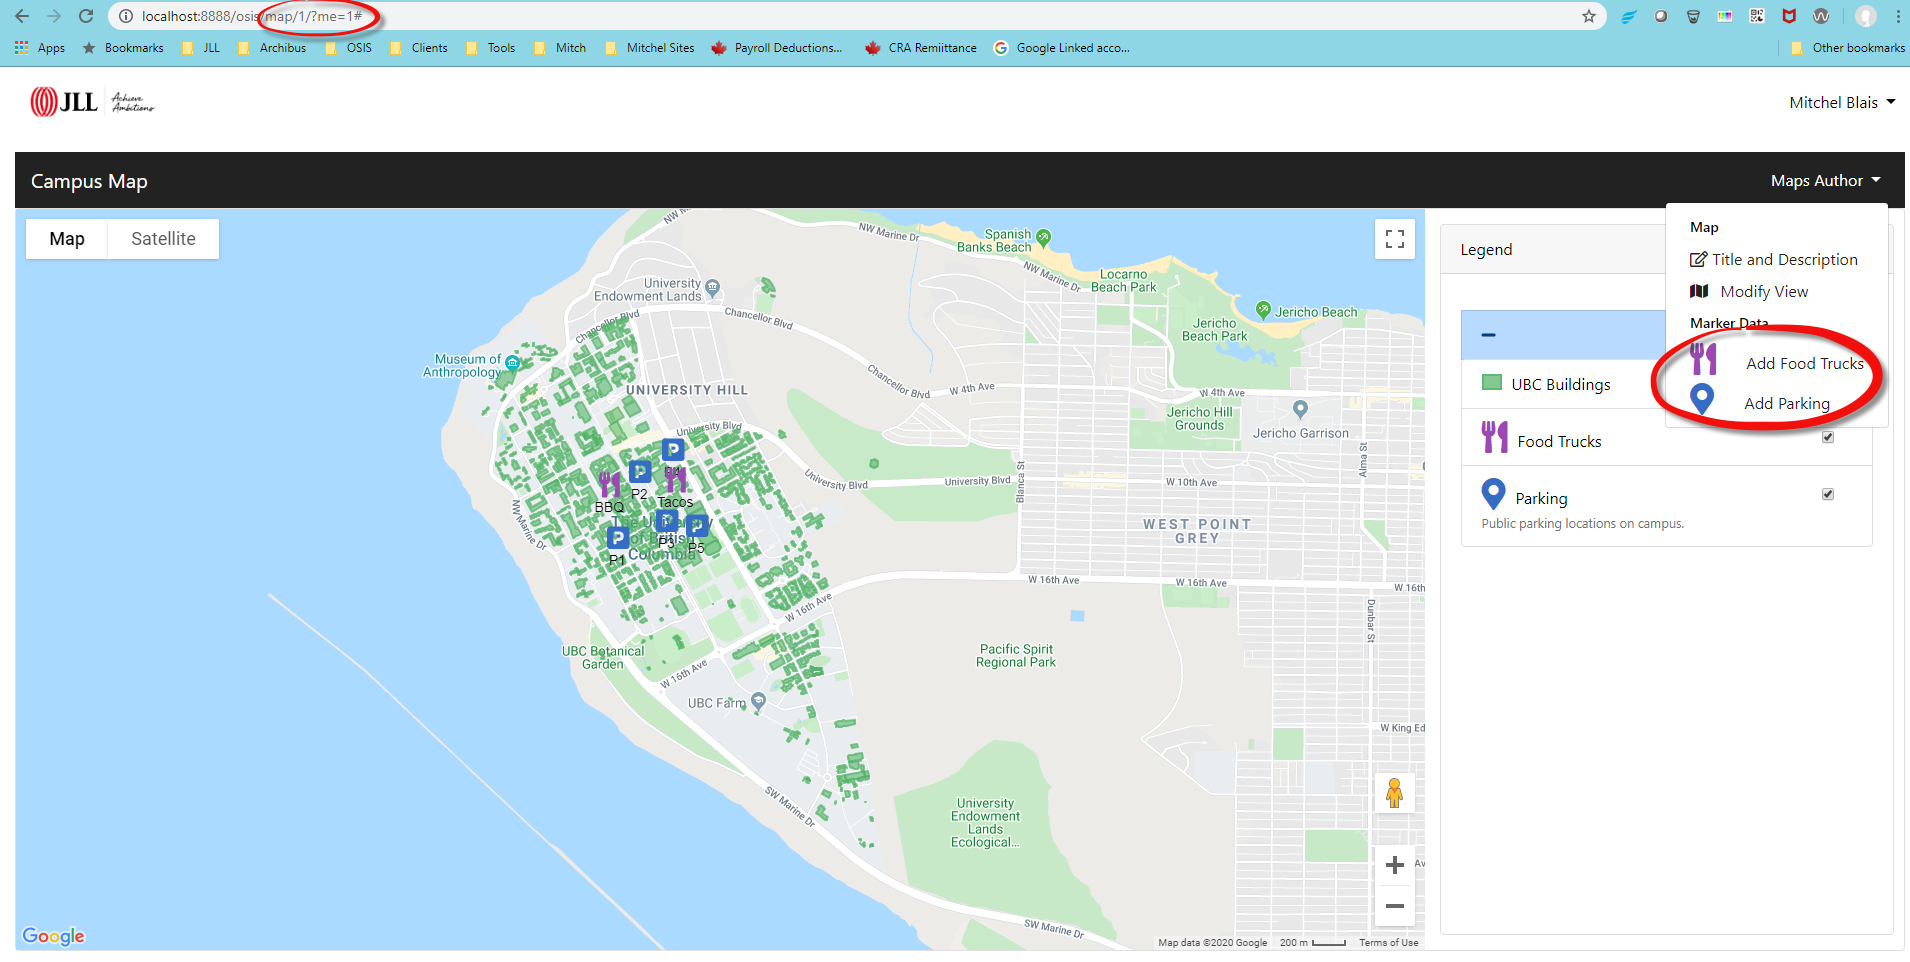
Layer data is retrieved by telling OSIS if the Layer Data Source is None, Geojson or External URL. When the Layer Data Source is set to None and the Layer Data URL is left blank, OSIS treats the layer as a point that can be manually placed on the map. To add a marker on the map, append ?me=1 to the /osis/map/2/ URL. The number 2 represents the map’s id. When the map loads, a map author dropdown will appear along the top right of the map header. Expand the dropdown and select the layer you want to manually place on the map.
A form opens up allowing the user to fill in details (Label, Description & Active) about the marker. Click the Place Marker button and begin placing marker on the map. Zoom into an area on the map and click on a location to populate the form with the Latitude & Longitude. Next, click the save changes button to save the markers location.

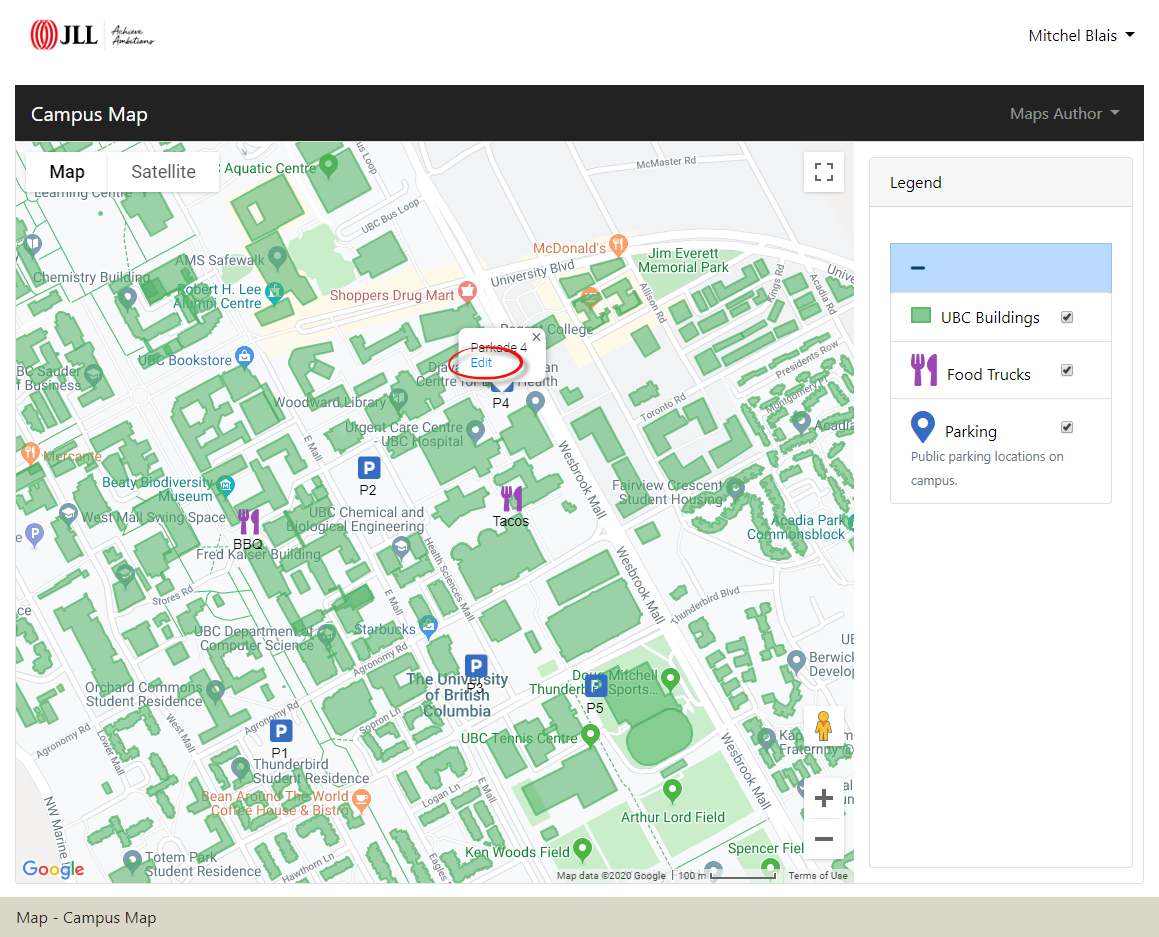
Select the manually placed markers on the map to edit the info or marker location.
When the Layer Data Source is set to Geojson, OSIS looks for a static geojson file within the Layer Data URL path specified. The geojson files can be stored anywhere on the server as long as the response is a valid geojson.
When the geojson layer data is stored on another server set the Layer Data Source to External URL and add the url in the Layer Data URL. Again, the data returned must be in a valid geojson format in order to use in OSIS.
The Date Published defaults to the current date & time. You can adjust the date and time by clicking the calendar, selecting a date and choosing a time by clicking the clock icon.
By default, the Is Active is set to yes. When it is set to no, the map layer is removed from the legend & map.
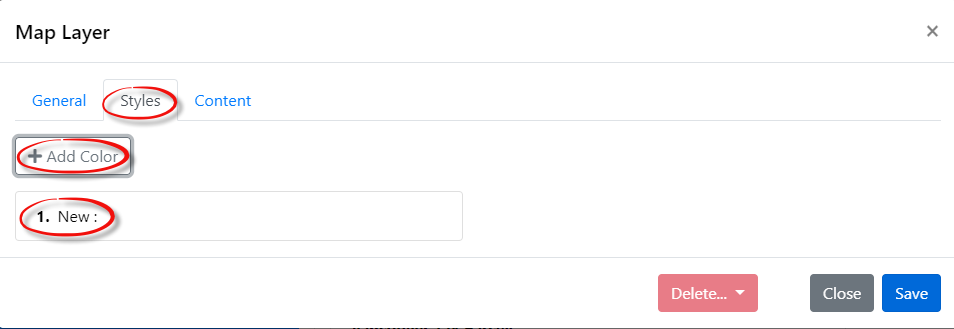
Map Layer - Style Tab
In the Map Layer modal, select the Styles tab and click the + Add Color button to style the layer. A new item will appear below. Click the 1. New: to open the layers styling form.
The Z Index, represents how high something is placed in the stack of layers visible on the map. A layer with a higher index will always be placed on top of layers with lower index values. For example, if the new layer has a z-index of 100, that layer will sit on top of all the layers with a z-index less than 100.
Each layer will have a Fill Opacity defining the opacity of the layer. A fill opacity of 0 represents full transparency whereas a fill opacity of 1 represents no transparency.

To choose the desired Color for the layer, click the bar on the right side of the color picker and drag it up and down to select a color. After choosing a color, use the left side of the color picker to choose a shade.
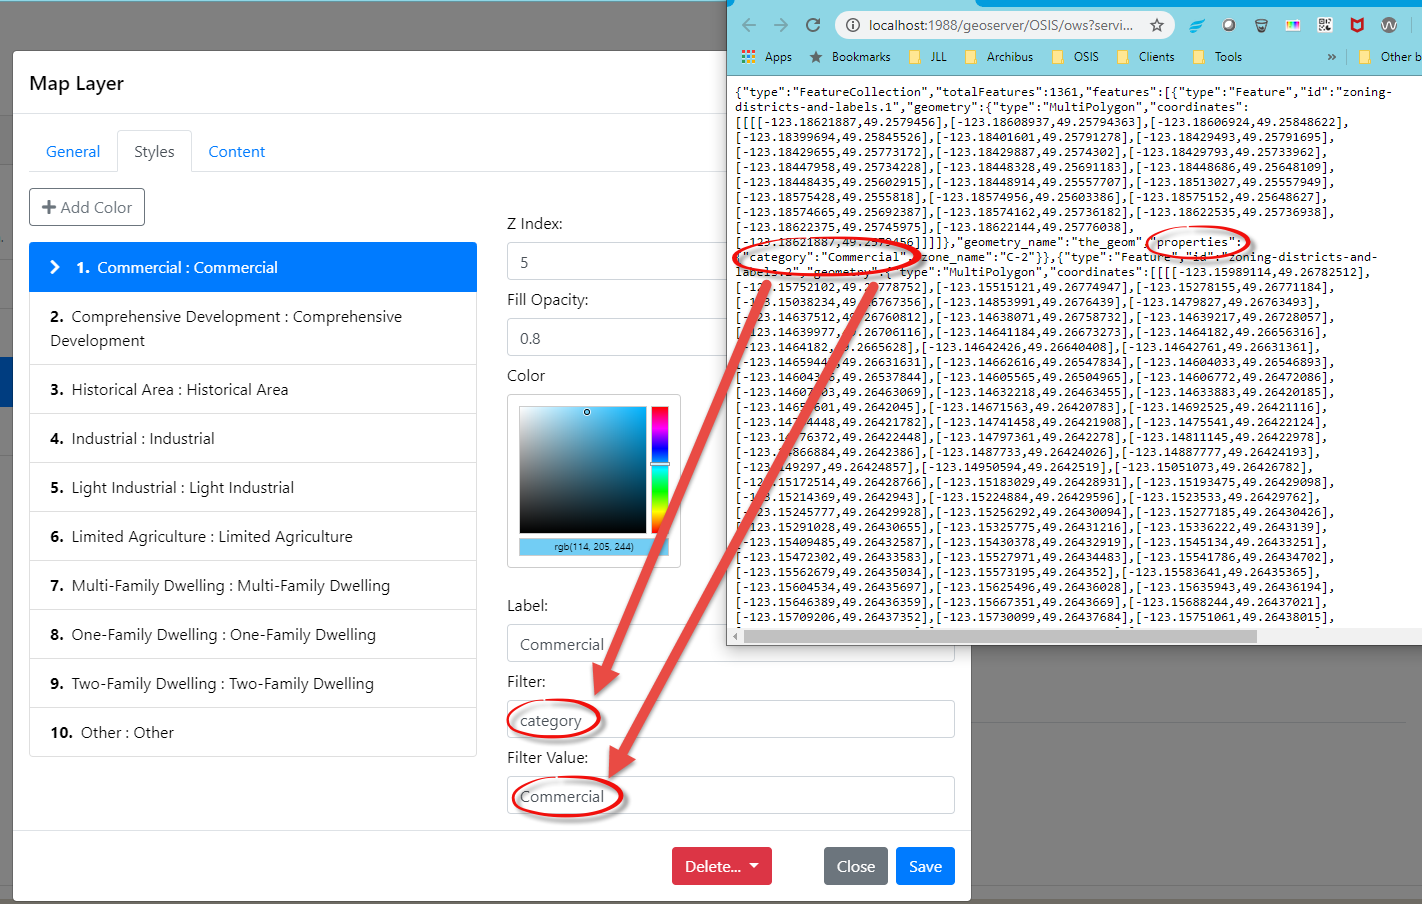
When creating a none themed layer, copy the title (under the General Tab) to the Label (in the Style Tab) and leave the Filter and Filter Value blank. However, when creating a themed layer, enter a theme Label depicting the geojson’s property value. In the Filter, add the geojson property that OSIS will use to theme the layer and input a Filter Value based on the property values in the geojson. The image below displays the geojson’s property named “category” (Filter) and a value of “Commercial” (Filter Value).
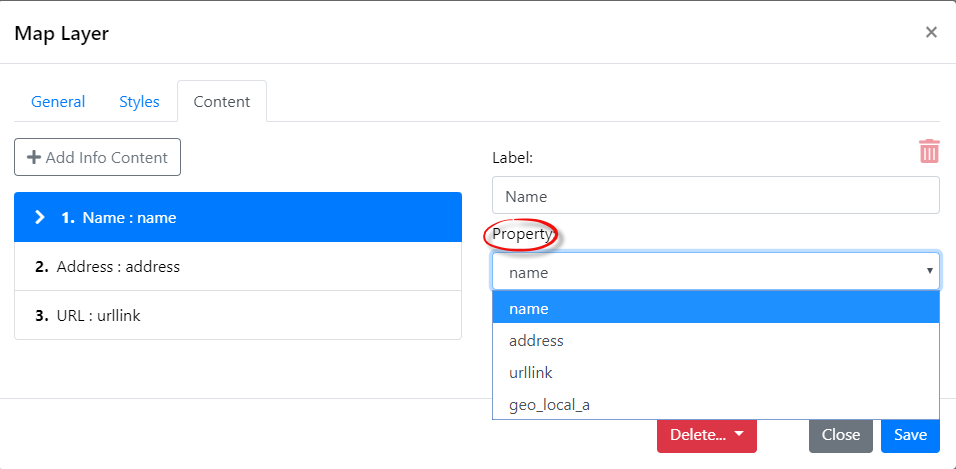
Map Layer - Content Tab
To configure the layer’s popup select the Content tab and click the + Add Info Content button. A new content box will appear below. Click the new box to open the content form.
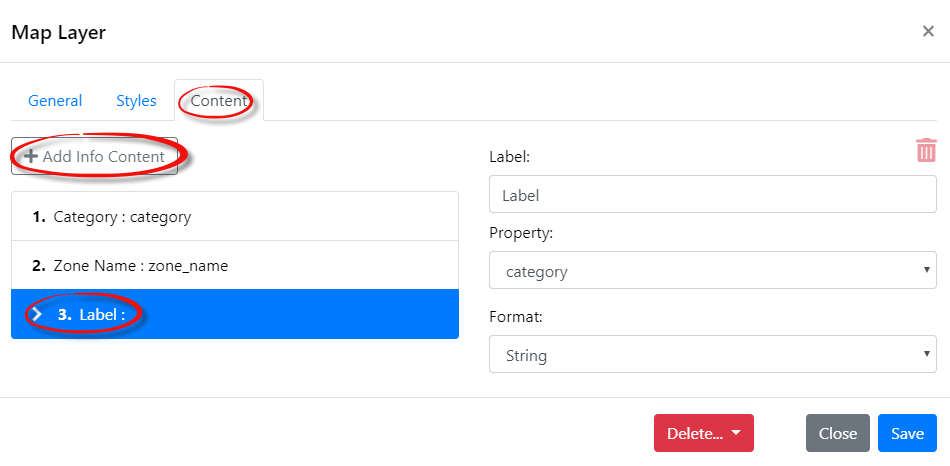
The content within each popup is laid as seen below. The bold Label acts as the properties title in the popup. The properties value is populated by selecting a geojson Property from the dropdown list, telling OSIS to display that property value for the selected record.
When adding new content or editing existing content, the Property dropdown automatically populates with the properties in the geojson.
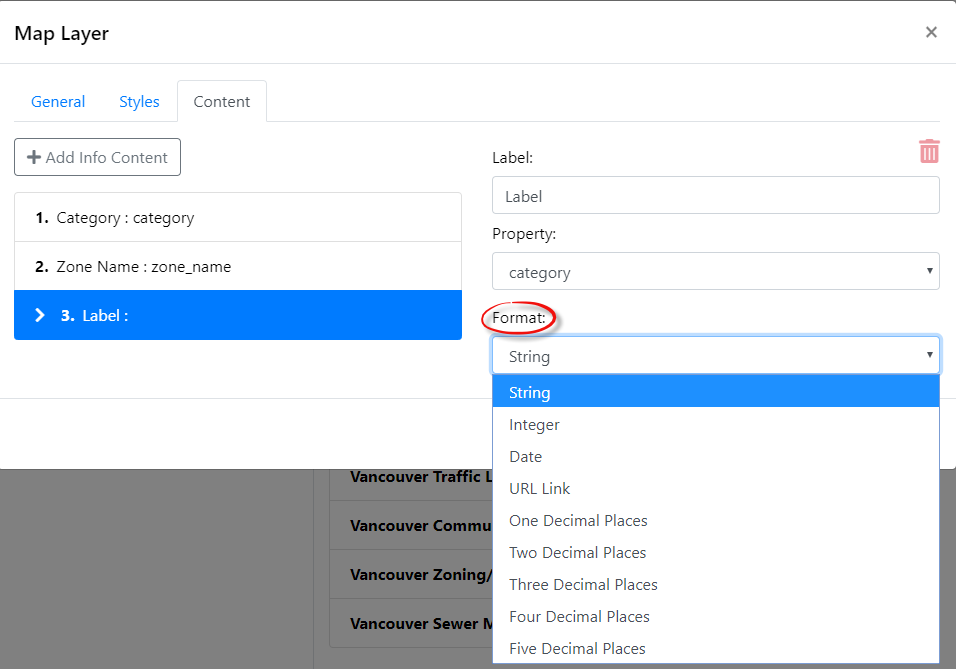
The Format dropdown gives the users the ability to format their content as a string, integer, date, url link or as a number with an exact decimal place.
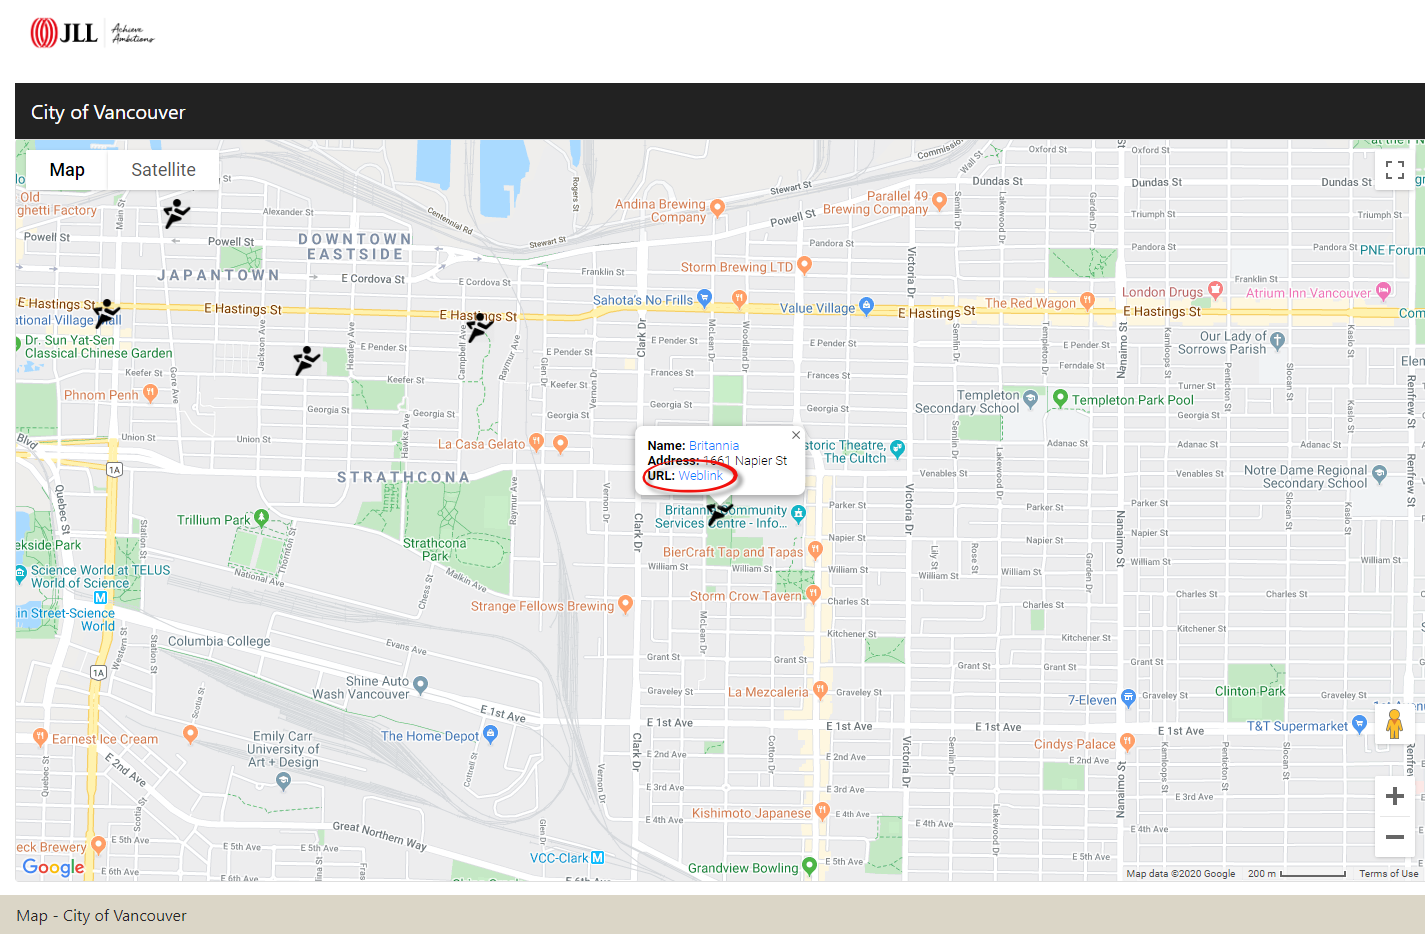
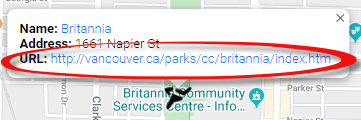
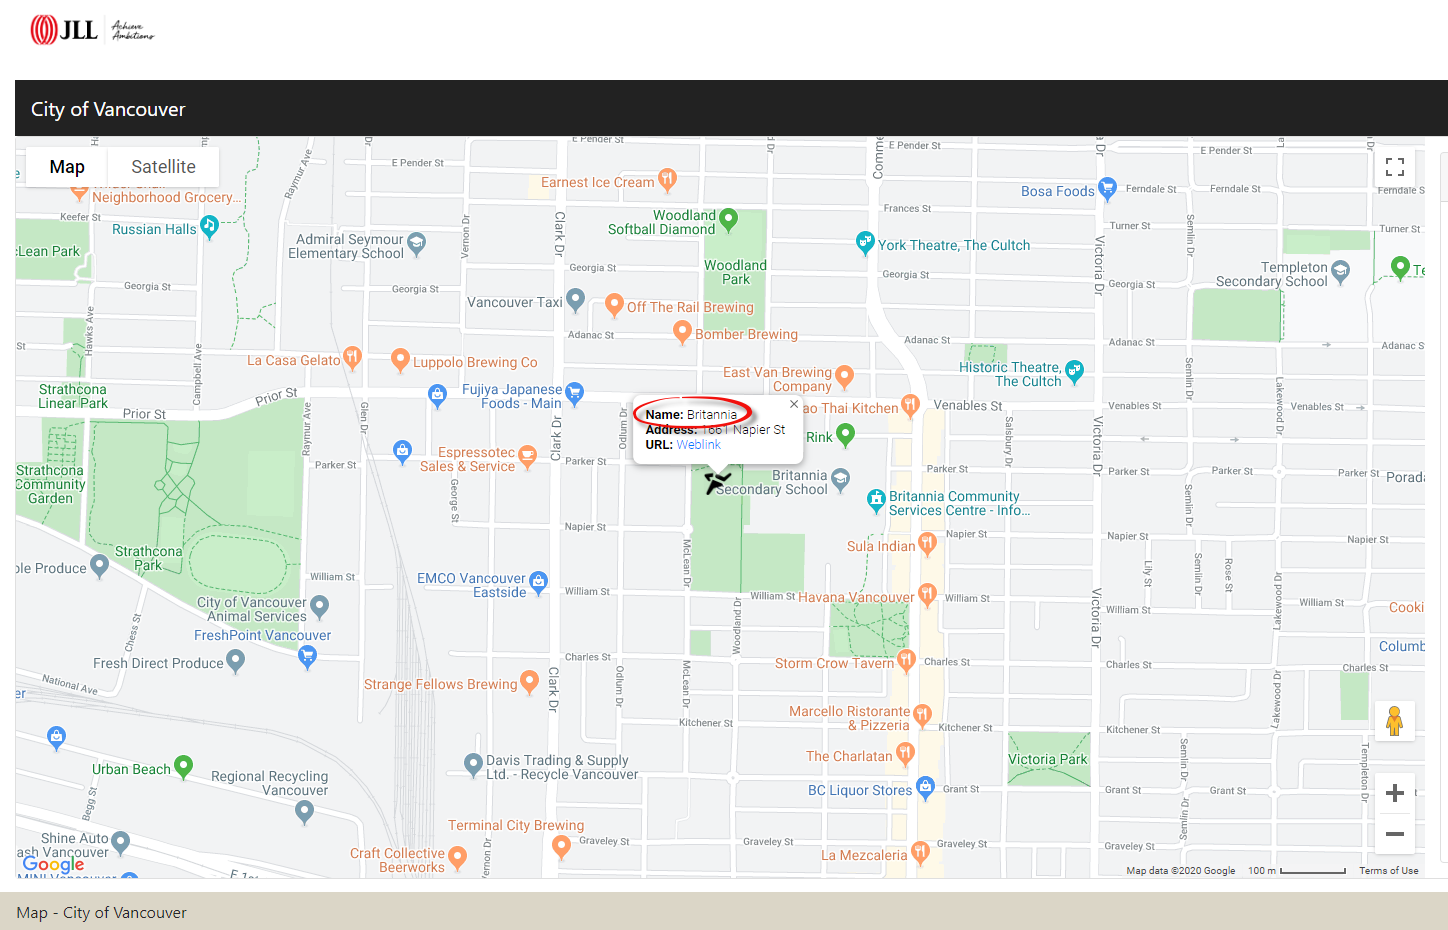
When the URL Link option is selected, the URL Text field appears. This section overwrites the properties url with the inputted text, decreasing the size of the popup. Below the text Weblink was added whereas in the last image the URL Text was left blank, therefore, exposing the entire url.