Floor Plan Display
Interact with data on a floor plan, navigate with zoom and pan, and customize views to support activies like space planning and move management. The floor plan display is organized into 3 areas: floor plan, navigation bar, and legend.

Floor Plan
The central part of the screen which displays a floor plan. The floor plan can be moved with common interactions like clicking and dragging, and zooming in and out. It is the base screen that data is layered on top of.
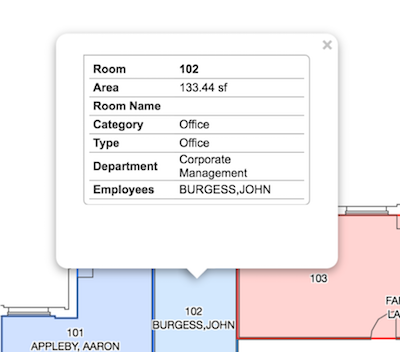
Rooms on the floorplan are interactive, and display a Pop-up window when they're clicked on. The pop-up window shows information about the room that was clicked. This information is determined by an administrator.
Navigation Bar
Provides quick access to floor plans and tools, through four dropdown menus:
- Building and floor - Navigate to different floor plans in the current building, from the dropdown in top left corner. The title of this menu indicates which building's floor plan is currently displayed.
- Tools - Select Show in New Window to open the current floor plan in a new tab, use Reload Floor to clear any changes to the view, and use Reset View to re-center the floor plan in the middle of the display.

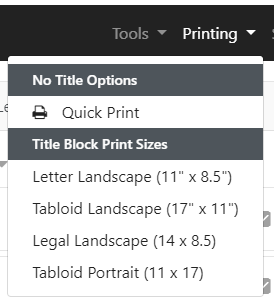
- Printing - Contains a Quick Print option to print the floor plan as it is displayed, as well as pre-defined Title Block Print Sizes used to customize floor plans, for print on specific page sizes
- Sets - Lists the different sets of data (such as occupancy, vacancy, and more) that can be displayed on the current floor plan

Legend
The legend describes the data displayed on a floorplan, and provides tools for manipulating it. It is organized into two areas: Layers and Search
Layers
Contains information displayed on a floorplan:
Labels
Text applied to spaces on the floor plan to display information like room number, type, or occupant. Click the dropdown icon to see a list of labels available. Click the checkbox icon to add or remove all labels from the floor plan.
Edit the style of labels on the floor plan from within the Labels dropdown. Click the Edit button to change the text height and color, and add bold, italics, and underline text effects.

Elements
Data that is displayed on the floor plan using colors and patterns. For example, a blue color might display which department occupies a desk, or a cross pattern might indicate that an office is vacant.
Layer Tools
An element can be added or removed from the floor plan by clicking the square tile beside its description.
Colors and patterns of elements in a layer can be set by an administrator or generated randomly. If element colors are random, clicking the circular arrow beside the layer title will refresh the color or patterns of all elements in the layer.
An entire layer can be manipulated with the checkbox beside its title. When all the elements in a layer are displayed, this checkbox adds and removes the entire layer. If any elements on the layer have been removed, this checkbox inverts which elements are displayed. For example, if 1 of 5 elements have been removed, clicking the checkbox will display the element that was removed and remove the elements that were displayed.
Rooms
Lists all the rooms displayed on a floorplan.
Search
Used to find and navigate to rooms located on the floor plan that's displayed. Rooms are found by searching according to their room numbers.
Clicking the magnifying glass icon next to the room number locates the room on the floor plan and highlights it. If elements are displayed on the room, then clicking the checkbox beside the room title will add and remove them.